Potatoes are one of the most beloved and versatile crops you can grow in your home garden. From fluffy mashed potatoes to crispy fries, these starchy tubers are a staple in many kitchens worldwide. Fortunately, potatoes are relatively easy to grow, making them an excellent choice for both beginners and seasoned gardeners. By learning the proper techniques and care, you can enjoy a large and delicious harvest right from your backyard.
This guide will walk you step by step through everything you need to know—from choosing the right potato variety to planting, spacing, caring for the plants, and harvesting your crop for maximum yield and flavor.
Why Grow Potatoes at Home?
Growing your own potatoes has several benefits:
- Better Taste: Freshly harvested potatoes taste richer and creamier compared to store-bought ones.
- Control Over Growing Conditions: You can avoid harmful chemicals and pesticides.
- Variety: Home gardeners can grow unique varieties that aren’t often available in supermarkets.
- High Yield: A small patch of garden space can produce a large amount of potatoes.
Whether you’re planting in raised beds, containers, or traditional garden rows, potatoes are rewarding and fun to grow.
Step 1: Choosing the Right Potato Variety
Potatoes come in many types, and choosing the right variety is key to achieving a tasty and large harvest. Here are a few popular options:
- Russet Potatoes – Best for baking and frying; large yields and fluffy texture.
- Red Potatoes – Smaller, waxy potatoes that are perfect for boiling, roasting, and salads.
- Yukon Gold – Golden, buttery potatoes that are versatile in cooking.
- Fingerling Potatoes – Small, elongated potatoes with a rich flavor.
- New Potatoes – Young, small potatoes harvested early for a tender, sweet taste.
Choose varieties based on your cooking preferences and local climate conditions.

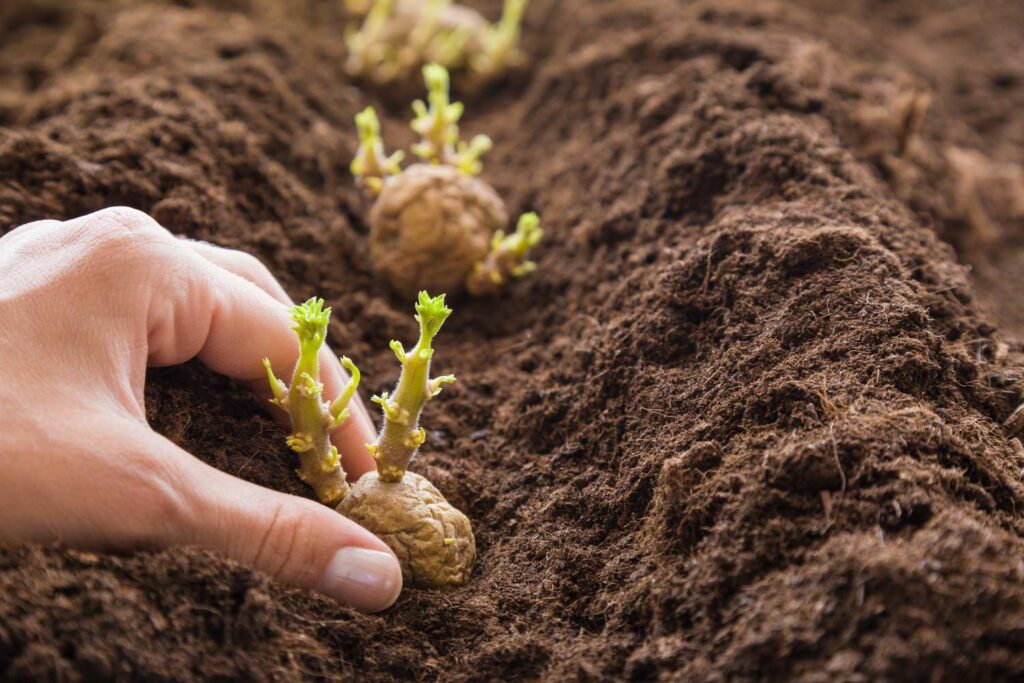
Step 2: Preparing Seed Potatoes
Potatoes aren’t usually grown from seeds but from seed potatoes, which are small tubers or pieces of tubers with at least one “eye” (a bud where a new shoot will grow).
Preparation process:
- Purchase certified disease-free seed potatoes from a reliable source.
- A week before planting, cut large seed potatoes into smaller chunks, each with 2–3 eyes.
- Allow the cut pieces to dry and form a callus for a couple of days. This helps prevent rotting when planted in the soil.
Tip: Smaller seed potatoes can be planted whole if they have multiple eyes.
Step 3: Choosing the Right Location and Soil
Potatoes need loose, well-drained, and nutrient-rich soil for proper tuber development. Clay-heavy or compact soil can restrict growth and cause smaller harvests.
Soil preparation tips:
- Loosen the soil to a depth of at least 12 inches.
- Mix in compost or organic matter to improve soil fertility.
- Aim for a soil pH between 5.0 and 6.0.
- Select a sunny location since potatoes need at least 6–8 hours of direct sunlight daily.
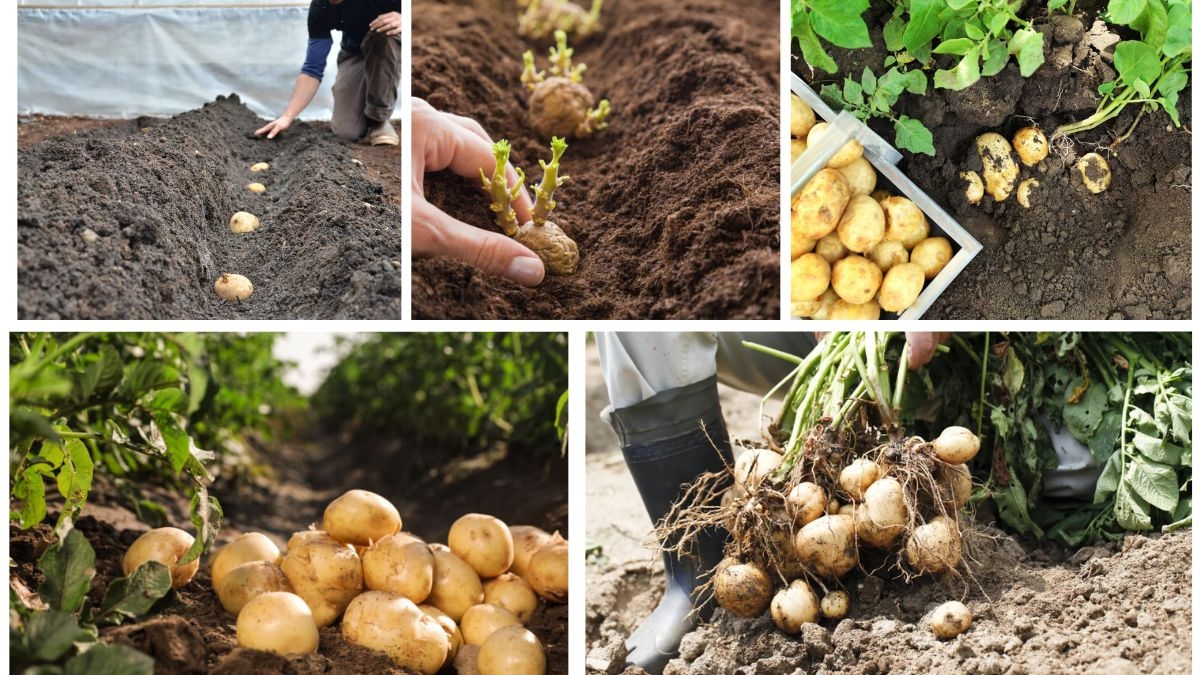
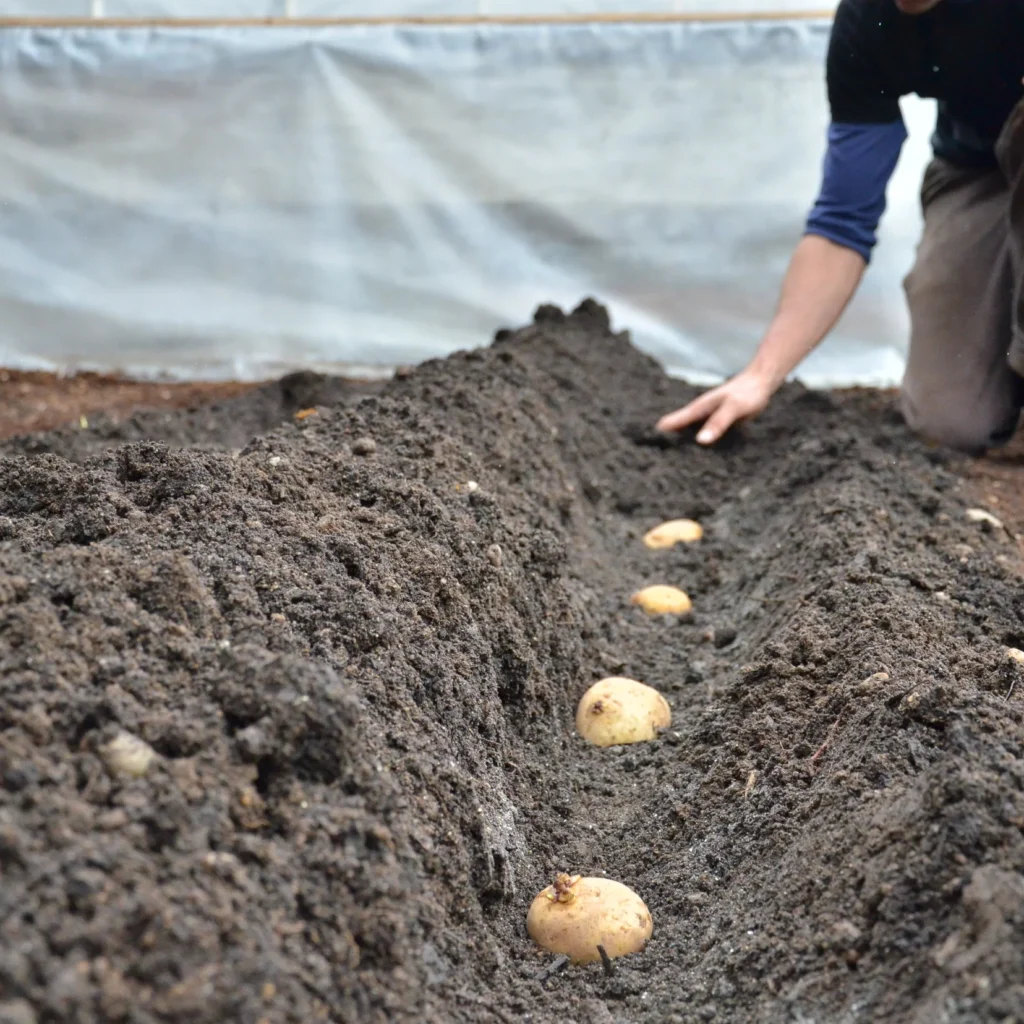
Step 4: Planting Potatoes
Once your soil is ready, it’s time to plant the seed potatoes.
Planting Method
- Dig trenches about 6–8 inches deep and 2–3 feet apart.
- Place seed potatoes cut-side down with eyes facing up, spaced about 12 inches apart.
- Cover with 4 inches of soil, leaving extra soil to use later for hilling.
Alternative methods include growing in containers, potato bags, or raised beds if you have limited garden space.
Step 5: Watering and Fertilizing Potatoes
Proper watering is essential for healthy potato growth.
Watering tips:
- Keep soil consistently moist but not waterlogged.
- Water deeply once or twice a week, depending on rainfall.
- Avoid overhead watering, which can encourage diseases like blight.
Fertilizing tips:
- Mix a balanced fertilizer (10-10-10) into the soil before planting.
- Side-dress plants with compost or organic fertilizer halfway through the growing season.
- Avoid excessive nitrogen, which produces lush foliage but smaller tubers.
Step 6: Hilling Potatoes for Larger Harvests
Hilling is one of the most important steps in potato growing. As potato plants grow, tubers form along the buried stems. Covering the base of the plants with soil encourages more tuber growth.
How to hill:

- When plants are about 6–8 inches tall, mound soil or compost around the base, covering the lower stems.
- Repeat hilling every 2–3 weeks until the soil mound is about 8–10 inches high.
This technique prevents tubers from being exposed to sunlight (which causes them to turn green and become toxic) and increases yields.
Step 7: Managing Pests and Diseases
Potatoes are susceptible to certain pests and diseases.
Common Pests:
- Colorado Potato Beetle – Handpick beetles and use natural predators.
- Aphids – Control with neem oil or insecticidal soap.
- Wireworms – Rotate crops and avoid planting potatoes in the same spot every year.
Common Diseases:
- Late Blight – Caused by fungi, it appears as dark spots on leaves. Prevent by ensuring good air circulation and using resistant varieties.
- Scab – Caused by soil bacteria, resulting in rough patches on potatoes. Lowering soil pH helps prevent scab.
Crop rotation and proper spacing help reduce disease risks significantly.
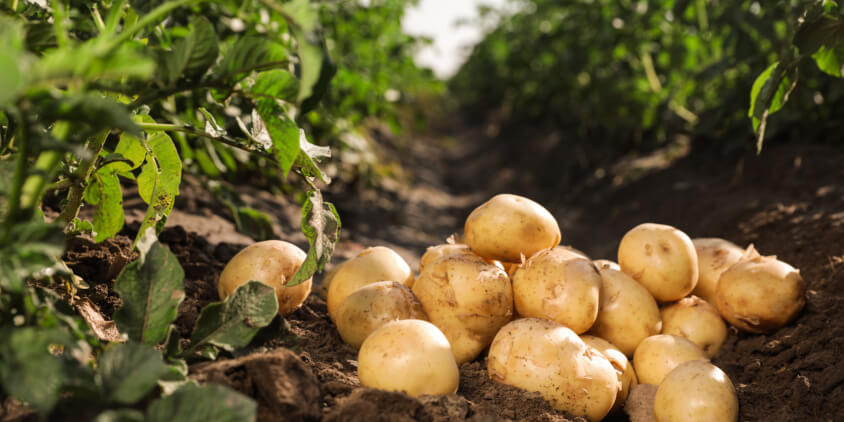
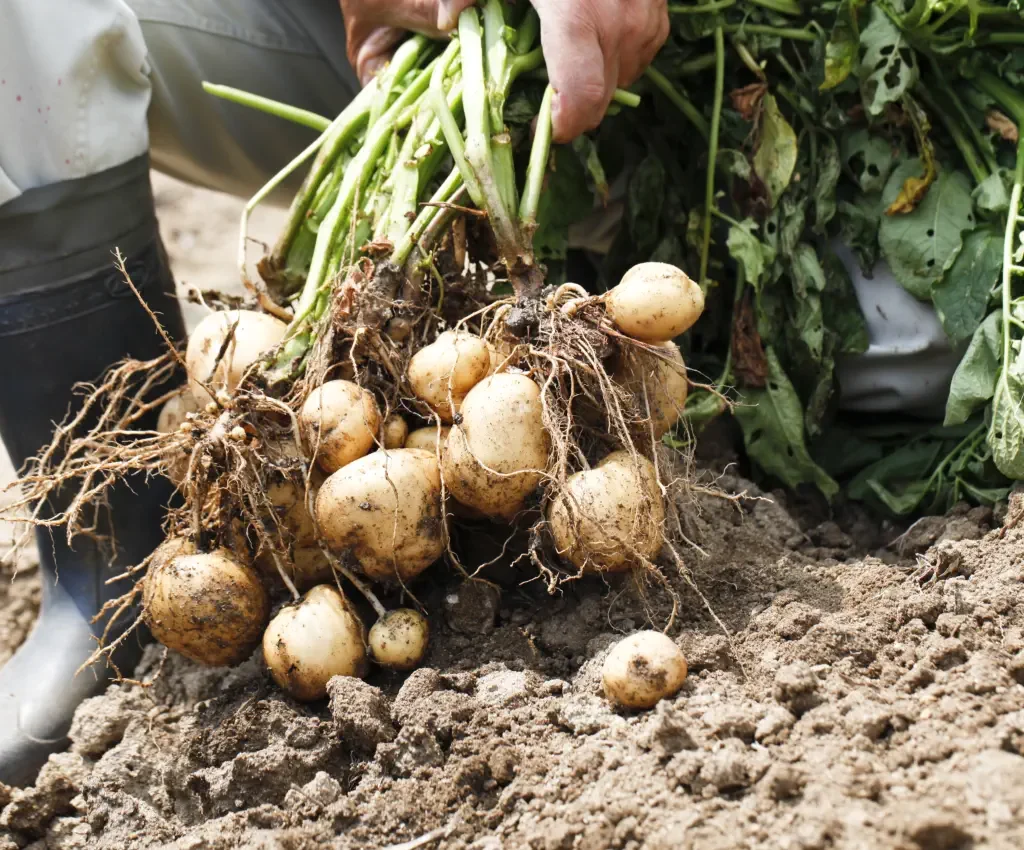
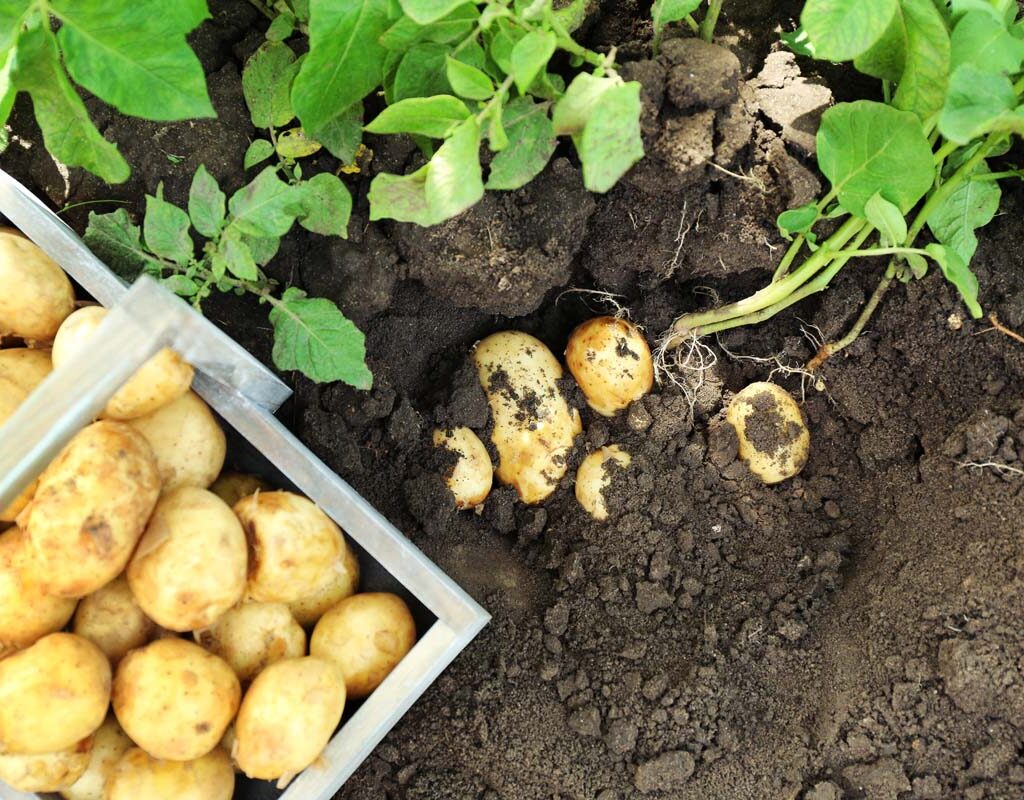
Step 8: Harvesting Potatoes
The moment you’ve been waiting for—harvest time!
For New Potatoes:
- Harvest 2–3 weeks after plants flower.
- Gently dig around the base and pull out small, tender potatoes.
For Mature Potatoes:
- Wait until the plant tops turn yellow and die back.
- Cut foliage to the ground and wait 1–2 weeks before digging.
- Use a garden fork to gently lift potatoes out of the soil, being careful not to puncture them.
Curing Potatoes:
- Lay harvested potatoes in a dark, well-ventilated area at 60–65°F for 1–2 weeks.
- This allows the skin to toughen, extending storage life.
Storage:
- Store cured potatoes in a cool, dark place (40–50°F).
- Avoid refrigeration, which converts starch into sugar, altering taste.
Step 9: Tips for a Larger and Tasty Harvest
- Start Early – Plant potatoes as soon as the soil warms to around 45°F.
- Use Mulch – Mulching conserves soil moisture and keeps tubers cool.
- Rotate Crops – Avoid planting potatoes in the same spot more than once every three years.
- Monitor Regularly – Check for pests and diseases early to prevent spread.
- Choose Multiple Varieties – Growing both early and late-season potatoes ensures staggered harvests.
Conclusion
Growing potatoes at home is not only rewarding but also an excellent way to enjoy fresh, tasty, and chemical-free vegetables. With the right preparation, soil conditions, proper spacing, and consistent care, you can achieve a large and flavorful harvest every season. By following this guide—choosing the right variety, hilling regularly, managing pests, and harvesting at the right time—you’ll soon be serving homegrown potatoes in your kitchen.
From garden to table, there’s nothing more satisfying than enjoying the fruits of your labor. With patience and the right techniques, your potato patch can provide abundant harvests year after year.
Leave A Comment